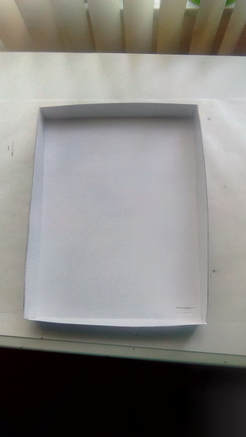
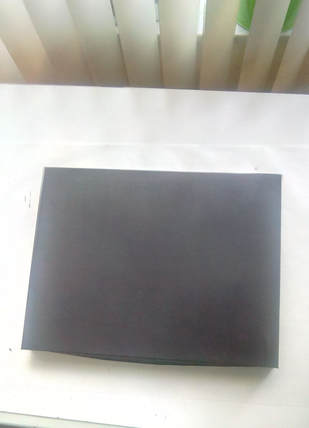
 Purchase a pre-cut matte board with an 8x10 window then measure around the window roughly 1/2". So the matte board will be over-all size 8-1/2 x 11" with an 8x10" window. Stick with a black matte you can purchase between $7-$10 depending on the store. 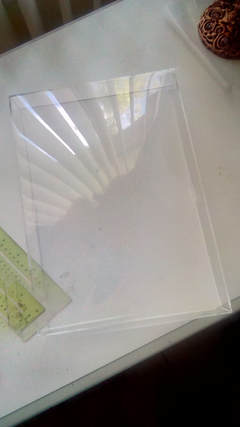 Purchase an 8-1/2" x 11" acrylic box frame. Roughly they cost around $5-$6 each at craft stores. It has a full acrylic front, four acrylic side panels & an open back. 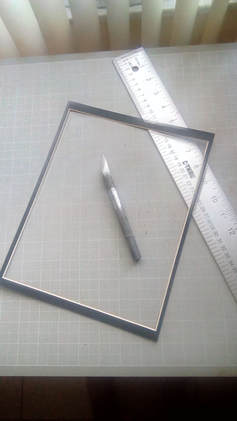 Go ahead & cut the edges off the matte board. Move gingerly as not to tear the corners. If a break occurs use Aleene's Clear Gel Tacky Glue to repair the matte board. 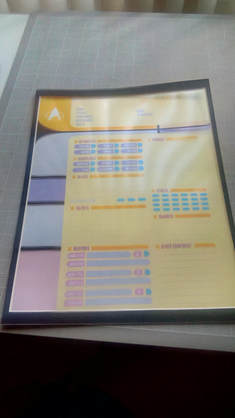 Print the Star Trek RPG character sheet onto printable overhead projector sheets. Using double sided tape, adhere the character sheet to the matte board. *Set aside in a safe spot. 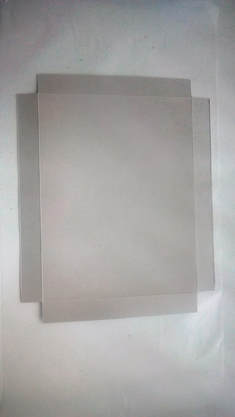 Either use the cardboard insert from the frame or create a backing box from bristol board. I'm using the cardboard insert anyway as a template but using bristol board for the actual box. This will fit snuggly into the frame to finish your console & will encase the lighting. 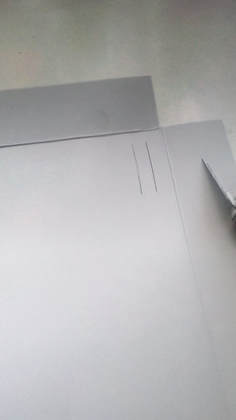 Using a hobby knife slice near a corner of the frame insert & cut a rectangular hole. 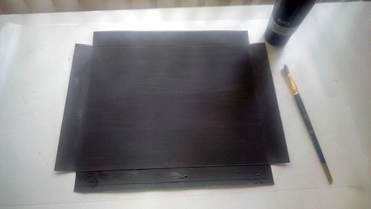 Paint one side black leaving the one side white of the frame insert.
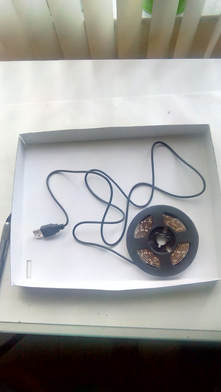 Purchase USB LED lighting. I'm using "cool white". These are typically used to backlight televisions. Available in all sizes, colors for about $11-$20 depending on how many bulbs are on the strip. The strip is "self adhesive" as well so no additional glue will be needed for the installation process. I recommend Luminoodle "bright white" or Chritronic "cool white". Each gives 50,000 hours of illumination. 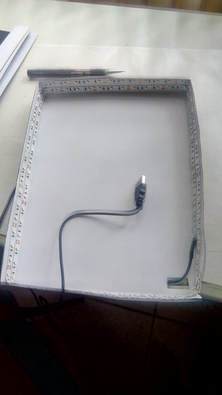 On the inside of the frame insert (the white side) start at the corner with the rectangular hole, pop the usb out through to the back. Peel & stick the LED strip all around the inside edge of the insert. 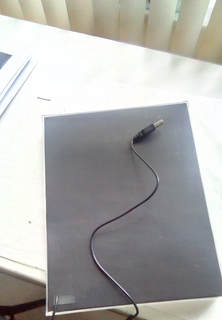 Now get your matte board assembly back out. Layers 1) Press the matte board assembly face down into the acrylic frame. 2) Insert a page of coated printer paper or card stock. 3) Press the LED insert assembly encasing all the layers into the acrylic frame. It will be snug. I don't choose to glue it into place should it need servicing in the future. Feel free to tape to anchor the backing in place. 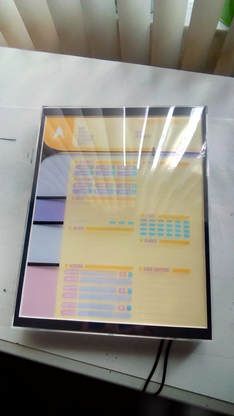 View from the front of the acrylic frame. You will use Dry Erase Markers during game play. I recommend Expo Low-Odor Fine Tip for use on this assembly. You can certainly use it as is without the lighting but that's the fun part so... 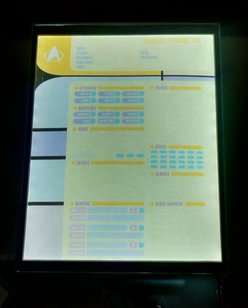 Plug it into a standard USB to add illumination to your adventure! 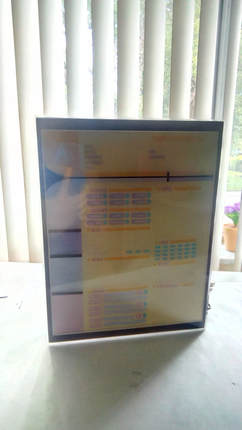 #Illuminated #StarTrek #Tabletop #RPG #Character #Stats Consoles. Taking your adventure to the next level!
0 Comments
|
Miss KRisFrom time to time I just like to play in the studio. Since the studio is not open to the public, I thought we could create something together here! Archives
September 2018
Categories |
 RSS Feed
