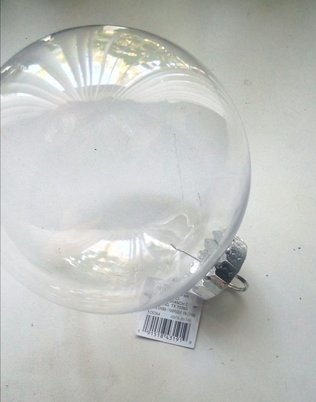
 Go to your local craft shop & purchase a clear glass ornament. I suggest you bring your D20 to make sure it will fit through the ornament stem opening. 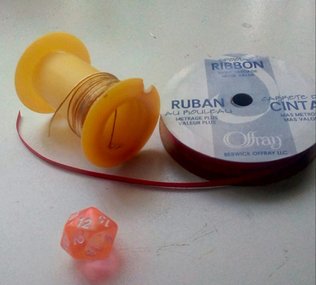 For the next few steps you will need: Brass wire 1/8" wide ribbon D20 Wire Cutters Needle Nose or Round Nose Pliers 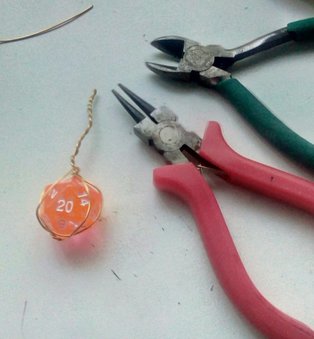 Wrap the wire down from the top of the die then give it a twist & bend it back up to the top. Wrap the wire into a nice long twist at the top. Trim off the end.  Use the pliers to bend the twist into a loop & hook it under one of the wires just to anchor it. 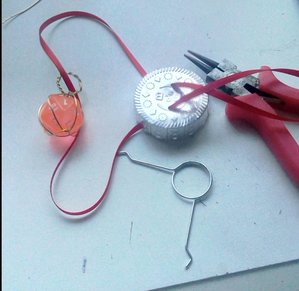 Remove the ornament hanger from the stem cover. Feed the ribbon through the die loop & press up through the stem cover. 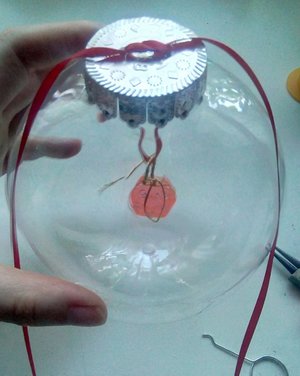 Just put the cover over the ornament stem to eye-ball the hanging of your die. Double knot the ribbon on the stem cover to anchor the hanging die. 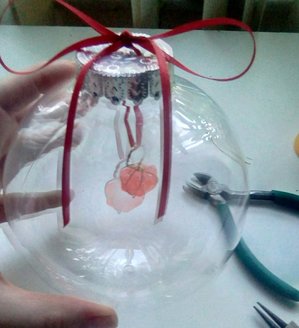 Tie a double knotted bow. Use your wire cutters or scissors to trim off excess length of ribbon. 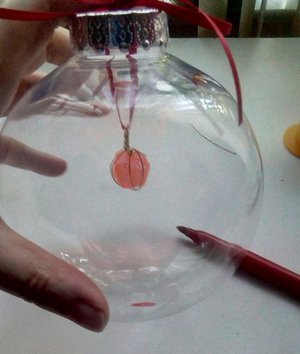 Using a permanent marker mark above & below where the die is hanging. 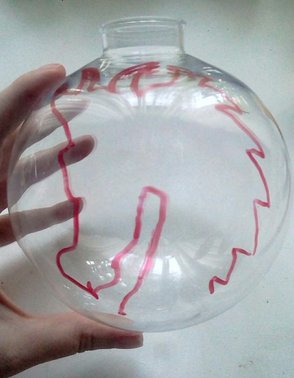 Remove the ornament step cover. Using the permanent marker again free hand draw a shape of your choice!  Pop the ornament ring back into position on the cover. Set aside in a safe place the ornament stem cover assembly. 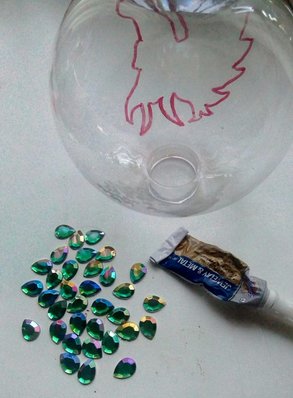 Choose the crystal or glass jewels you wish to use to decorate your ornament. Do NOT use plastic anything, it will melt during this class! 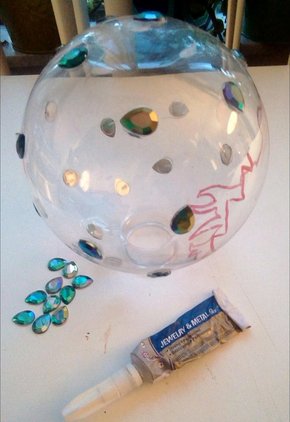 Using Jeweler's glue adhere the jewels to the ornament! Allow to dry completely. 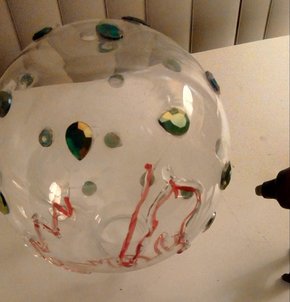 Set your hot glue gun to LOW temp. Follow along your marker shape with a bead of hot glue. Allow to cool completely. 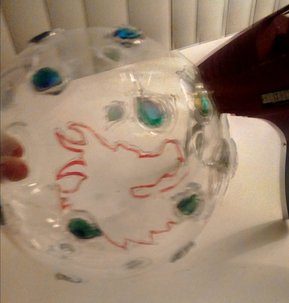 Hot glue around all the jewels first. Allow to cool completely. 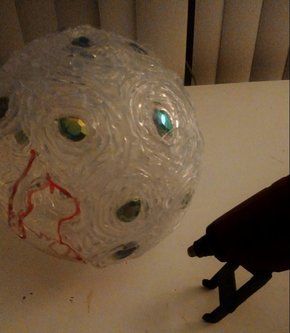 Hot glue around again & again allowing to cool completely with each application. If you don't allow it to cool completely the ornament will become to hot & break. In hind-sight I wish I'd skipped the jewels & just done dragon scales which would have been cool too! 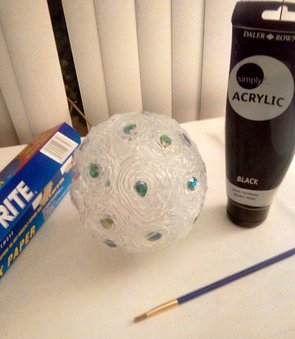 As is actually looks really cool, but let's paint! Cover your work area with wax paper, get out acrylic paints. You'll need #8 & #10 flat brushes for the rest of this class.  Using the #8 flat brush & black acrylic paint around the shape on your ornament. 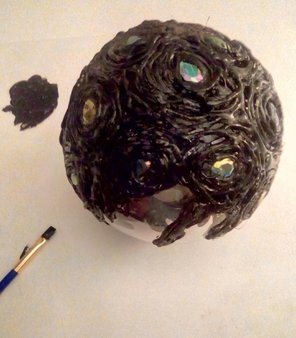 Continue painting getting into all the nooks & crannies. Allow the paint to dry completely. Stem down it will allow the ball of the ornament to dry uninterrupted. 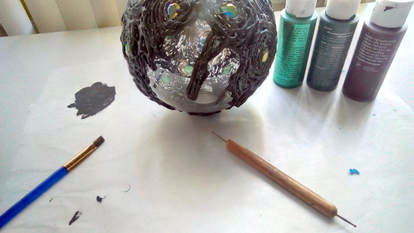 Choose a dark, medium & foil color. I chose Brown, Sage Green & Emerald Foil acrylic paints.  Using the #8 flat brush and your dark color, load the brush excessively! 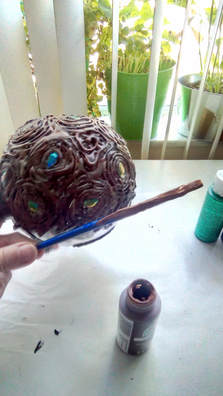 Glue over the tops of all of the glue lines, generously. Allow to dry completely. Stem down it will allow the ball of the ornament to dry uninterrupted. 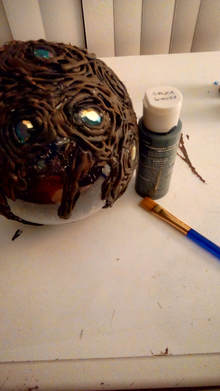 Using the #10 flat brush & your medium color. 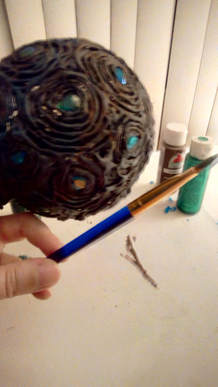 Dry brush the medium color sparingly over the glue lines. Let the brown & black show through. It should be dry by the time you get all around the ornament but make sure it is dry completely before next step. 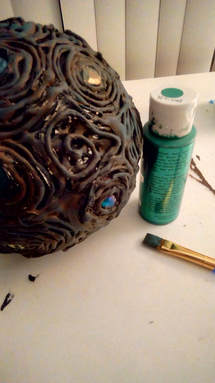 Using the #10 flat brush & your foil color. 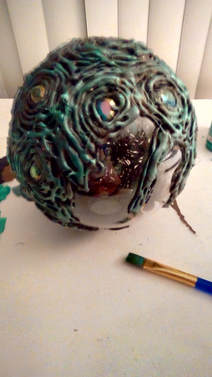 Dry brush sparingly over all the glue lines. Allow to dry completely. Once dry. Using warm water & a q-tip clean any paint of the jewels and also off the shape! 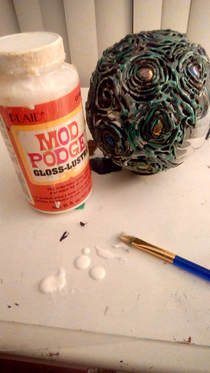 Using Gloss Mod Podge & your #10 flat brush cover all the painted surface to seal. 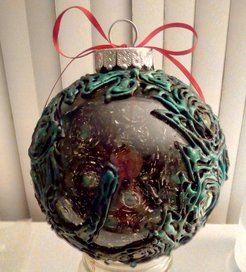 Lower the die into the ornament & pop the stem cover back into place. The jewels let in light so once it's hung on a lighted tree the inside of the ornament will sparkle. I used a glow die just for extra ooo-ahhhh factor.
0 Comments
Leave a Reply. |
Miss KRisFrom time to time I just like to play in the studio. Since the studio is not open to the public, I thought we could create something together here! Archives
September 2018
Categories |
 RSS Feed
